
You're standing at your dresser with three rings in your palm, each one appealing alone and somehow wrong beside the others. One feels too bold, another disappears, and the third keeps rotating toward the side of your finger. That frustration usually isn't a lack of style. It's a lack of structure.
Learning how to stack rings means treating your jewelry as a wearable system, not a random pile. The right combination depends on order, proportion, spacing, and comfort. Once those decisions are deliberate, even a collection of unrelated rings can look polished.
Table of Contents
- Setting the Stage for a Stack That Actually Works
- The Core Layering Formula Every Stack Starts With
- Mixing Metals, Stones, and Textures With Intention
- Sizing and Comfort Rules for a Stack You Can Wear All Day
- How Many Rings Is Too Many
- Outfit Pairings From Coffee Runs to Date Night
- Quick Reference and Common Stacking Mistakes to Avoid
Setting the Stage for a Stack That Actually Works
A ring stack is two or more rings arranged across one or both hands with intentional spacing and balance. You might wear multiple bands on one finger, distribute rings across several fingers, or build a coordinated arrangement across both hands. The common thread is purpose. Each ring needs a role.
Most unsuccessful stacks fail for predictable reasons. The rings compete rather than complement one another, several widths collide, gemstones demand attention at the same time, or every available space gets filled. The hand then looks busy instead of styled.
Start with the three decisions that control everything
Order determines where the eye lands first. A wider band or detailed stone ring usually needs a clear position as the visual lead.
Proportion keeps the pieces from fighting. A substantial ring needs quieter companions, while delicate bands can support one another without making the hand look heavy.
Restraint creates polish. Leaving a finger bare can make the rings you are wearing look more intentional, not incomplete.
A practical example: place a sculptural ring on your index finger, add a medium band on the middle finger, then leave the pinky bare. The arrangement has movement because the rings don't form one dense block.
Stylist's rule: A good stack looks considered because every ring earned its place, not because every ring was worn.
If you're traveling with several pieces, keep the same editing mindset when packing. A compact jewelry routine, such as the one outlined in this guide to storing jewelry while traveling, also helps prevent you from bringing every option and creating unnecessary clutter.
The Core Layering Formula Every Stack Starts With
Strong stacks usually follow a visual progression. Build from the piece with the most presence, then move toward quieter rings that create contrast without competing.
Build from visual lead to quiet detail
- Anchor the hand with a statement ring. Choose a wider band, a stone ring, or a design with a noticeable silhouette. The index or middle finger usually gives a substantial piece enough space to lead.
- Add a contrasting band. Place a mid-weight ring on an adjacent finger, or pair it with the anchor on the same finger if the widths allow. A plain polished band can calm a detailed ring, while a textured band can give a smooth stone setting more dimension.
- Finish with slim bands. Rings between 1 and 2 millimeters wide work well as quiet accents. Use them on the ring finger or pinky to taper the overall look rather than adding more bulk near the center of the hand.
- Change texture instead of repeating it. Smooth beside brushed, rope, or hammered finishes gives each ring a visible edge. Two rings with identical shine and profile can visually merge into one thick band.
- Keep gemstone colors edited. A tight palette of two stone colors is easier to style than a collection of unrelated hues. Let one gemstone lead and use the second as a supporting note.
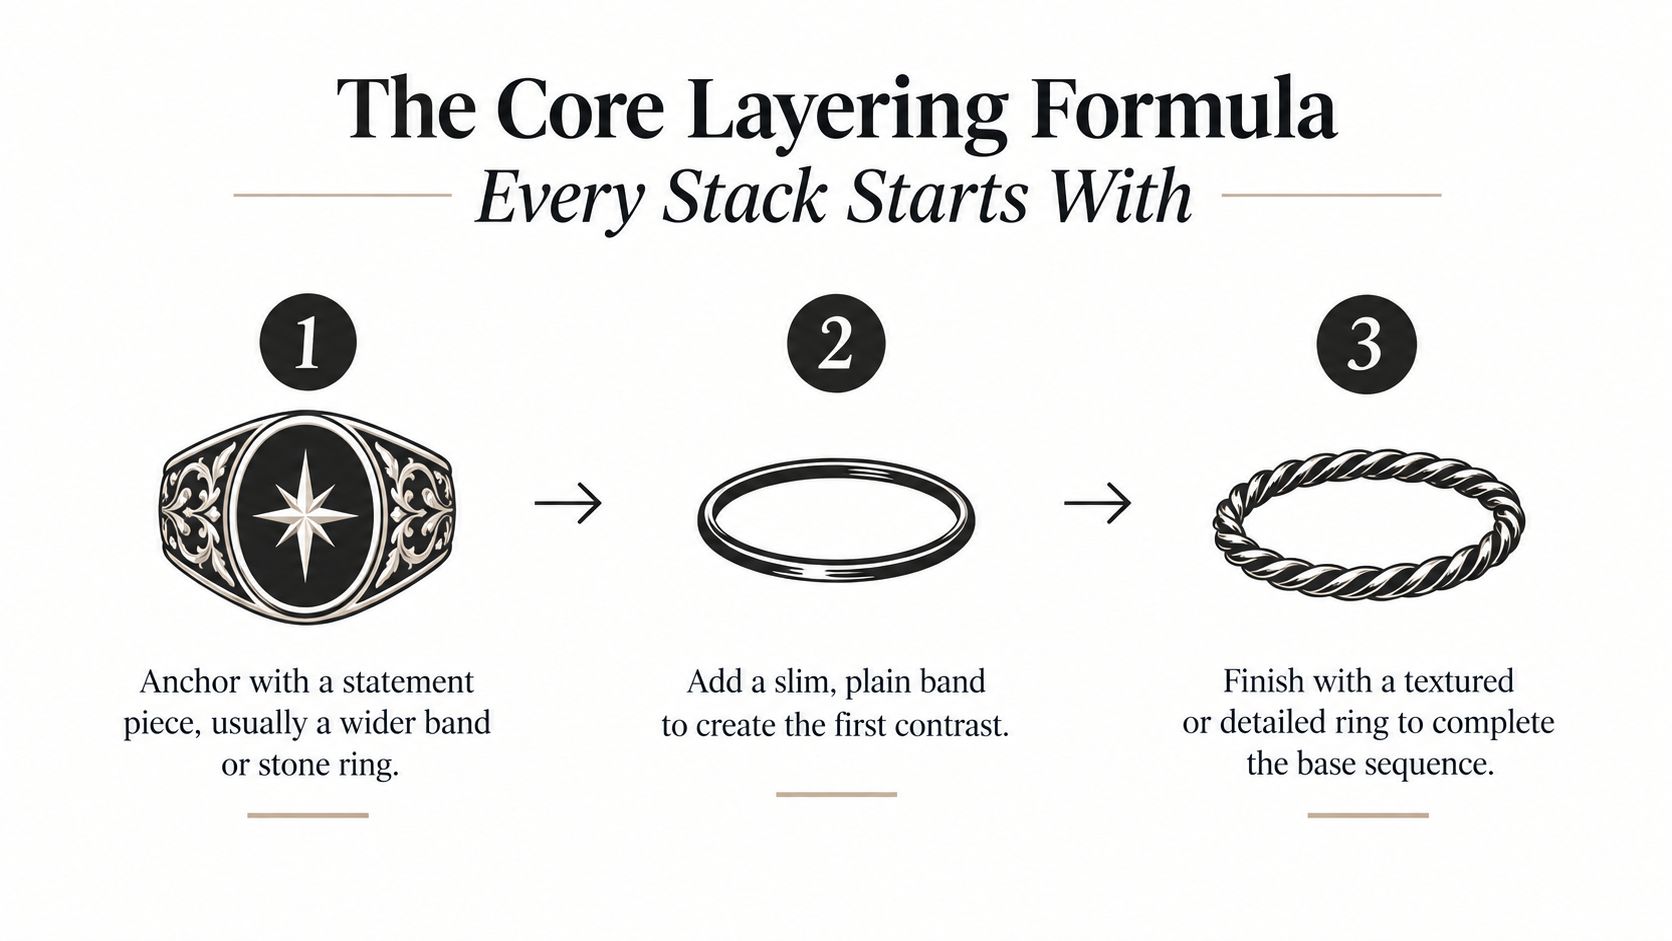
The easiest visual rule is to place the widest or busiest piece higher on the hand, closer to the knuckles, then let the design narrow toward the fingertips. This creates a gentle taper. A heavy band beside another heavy band often makes the hand look compressed, while a slim finishing ring gives the eye somewhere to settle.
Avoid forcing every piece into one finger. Intertwining stackable rings can provide movement within a coordinated grouping, but the same principle still applies, the complete arrangement should have a clear lead and a quieter finish.
Mixing Metals, Stones, and Textures With Intention
Mixed metals look deliberate when one choice controls the palette. They look chaotic when every ring introduces a new finish, color, or visual language.
A two-clean-metals rule is the most reliable starting point. Choose two dominant metals, such as yellow gold and silver, then allow rose gold to appear only once as a small spacer or fine accent. That third metal should read as a whisper, not as a new theme.
A single-metal stack remains the safest option. All yellow gold feels classic, while all silver or white metal looks crisp and understated. Mixed metal stacks feel more modern and editorial, but they need stronger control over shape and texture.
Use stones as part of the palette
Cool-toned stones, including sapphire, amethyst, and aquamarine, generally sit comfortably with white metals. Warm stones such as citrine, garnet, and ruby feel more connected to yellow or rose gold. A clear stone, such as a diamond or white topaz, can bridge the combination because it reflects the colors around it.
Texture does the same work as color, but with less visual noise. Try polished beside rope, hammered beside smooth, or matte beside high shine. Keep the silhouettes different enough to separate, but not so different that the stack loses its relationship.
| Combination | Result | Best For |
|---|---|---|
| One metal, mixed textures | Refined and cohesive | Daily wear and understated styling |
| Yellow gold with silver | Crisp contrast | Modern casual outfits |
| Yellow gold with one rose gold accent | Warm and layered | Personalized stacks with a softer finish |
| Cool stone with white metal | Clean and luminous | Minimal or tailored looks |
| Warm stone with yellow or rose gold | Rich and expressive | Evening outfits and autumnal palettes |
| Clear stone with mixed metals | Bridged and balanced | Collections containing several metal colors |
If you're unsure whether your combination works, compare the pieces in natural light and remove one ring. This explanation of mixing gold and silver is a useful starting point, but your hand should remain the final test. If one metal disappears or one stone dominates every neighboring piece, edit before adding anything else.
Sizing and Comfort Rules for a Stack You Can Wear All Day
A stack should be measured as one wearing system. Start with the largest and widest band, because its coverage controls how much room the combined arrangement needs. Thinner rings may match that base size, while a quarter-size increase can provide useful clearance when several pieces sit together.
For stacks wider than about 5 to 6 millimeters, expert guidance commonly recommends sizing up by about one-quarter size. For stacks wider than 7 millimeters, about one-half size may be needed because the combined bands cover more of the finger and leave less flexibility at the knuckle, as explained in Blue Nile's ring-stacking guidance.
Test the exact arrangement, not an imaginary one
Measure around both the finger base and the knuckle. Build the precise order you plan to wear, then check that you can bend the finger, make a gentle fist, and remove the stack without force.
Wear the complete arrangement for at least eight hours, following the practical testing guidance in this multi-ring sizing guide. Try typing, washing your hands, and moving through a normal day. Marks that fade within about 30 minutes can be acceptable, but lingering redness, pressure, or restricted movement means the stack is too tight.
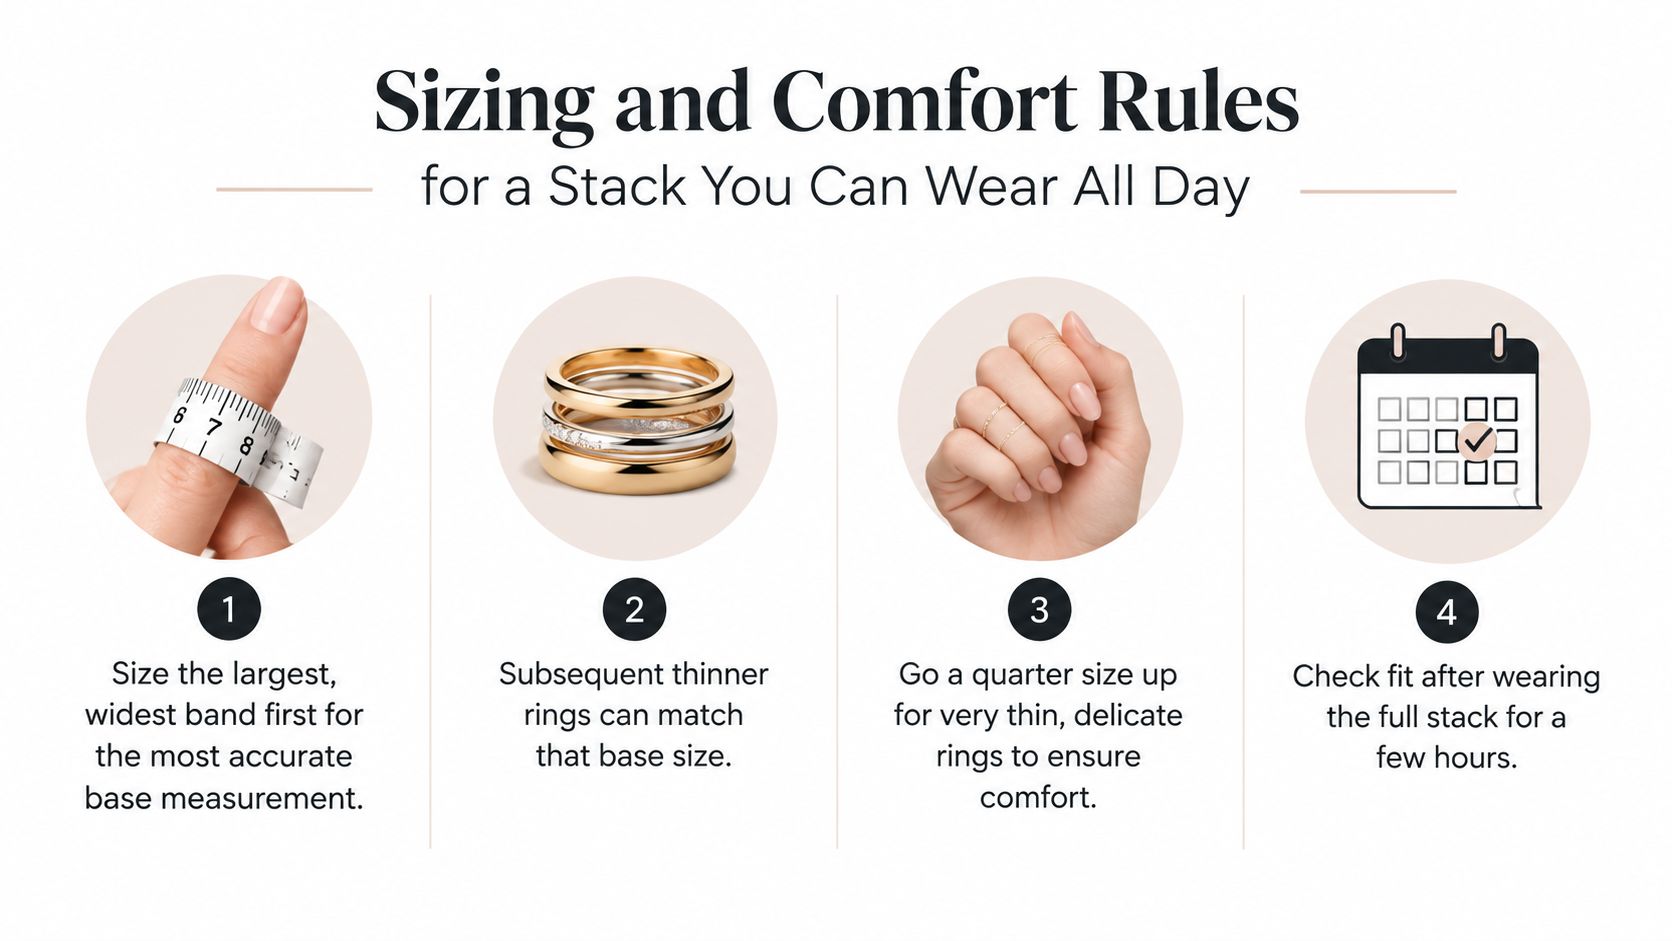
Heat can make fingers expand, while cold can make them contract, so size for your normal daily state rather than the coolest or warmest moment. A ring that's too tight creates pinch points and traps moisture between bands. One that's too loose rotates, separates from the arrangement, and makes the stack look accidental.
Comfort check: If you're constantly adjusting the rings, the problem isn't your styling. It's the fit.
For a deeper measurement process, use this guide to finding your ring size. A ring guard can help stabilize a loose piece temporarily, but it shouldn't compensate for an incorrect size.
How Many Rings Is Too Many
The modern sweet spot is 2 to 4 rings per hand, with visible breathing room between them. That range keeps a stack expressive without turning the entire hand into one solid band of metal, a restraint-first approach also reflected in recent ring-layering guidance.
Negative space matters in two places. Gaps between rings help each piece remain legible, while bare fingers across the hand prevent the arrangement from looking over-assembled. The result photographs better because the eye can identify individual shapes instead of reading one dense mass.
Distribute weight instead of mirroring both hands
Let the index, middle, and ring fingers carry the main stack. A pinky or thumb usually works best with one quieter piece. Don't place three wide bands on adjacent fingers. Their combined scale compresses the hand visually and leaves no resting point.
Asymmetry looks fresher than a mirrored set. You might wear a gemstone ring and two slim bands on one hand, then a single textured band on the other. A bridal stack can be an exception, especially when the ring finger carries meaningful pieces and the rest of the hand stays restrained.
The Two Finger Twist Ring is another exception to ordinary distribution because its design spans two fingers. Treat it as the statement for that hand, not as one more piece to place beside several equally bold rings.
Outfit Pairings From Coffee Runs to Date Night
The same ring collection can feel relaxed, professional, or dramatic depending on how much visual weight you give it. Match the stack to the outfit's structure, not just its color.
Casual coffee run
Start with a chunky signet on the index finger. Add two thin gold bands on the middle finger and a hammered silver midi ring on the ring finger. The contrast works with denim and a slouchy knit because the outfit already has relaxed texture, so the rings can feel collected rather than overly polished.
Keep the remaining fingers bare. That open space stops the signet from becoming too dominant and lets the silver band create a small, intentional interruption.
Workday polish
For a customized setting, use a thin solitaire on the ring finger, a pavé eternity band on the middle finger, and a polished gold band on the index finger. Pair the stack with a blazer and a watch, then keep the rest of the jewelry quiet.
The solitaire gives the hand a focal point, the pavé band adds controlled light, and the plain gold ring supplies visual weight without introducing another busy setting. This combination looks finished during meetings but won't compete with a cuff, watch, or structured sleeve.
Evening contrast
For date night, let one gemstone cocktail ring lead. Place two micro-pavé bands nearby, then add a delicate rose gold chain ring as the softest detail. A black slip dress and bare wrist create enough negative space for the stack to feel deliberate.
The key is hierarchy. The gemstone supplies color and scale, the pavé rings provide controlled sparkle, and the chain ring adds movement. Don't add a second statement ring on the opposite hand unless the outfit is otherwise extremely minimal.
| Occasion | Stack Composition | Outfit Pairing |
|---|---|---|
| Casual coffee | Chunky signet, two thin gold bands, hammered silver midi ring | Denim and a slouchy knit |
| Workday | Thin solitaire, pavé eternity band, polished gold band | Blazer and watch |
| Evening | Gemstone cocktail ring, two micro-pavé bands, delicate rose gold chain ring | Black slip dress and bare wrist |
Quick Reference and Common Stacking Mistakes to Avoid
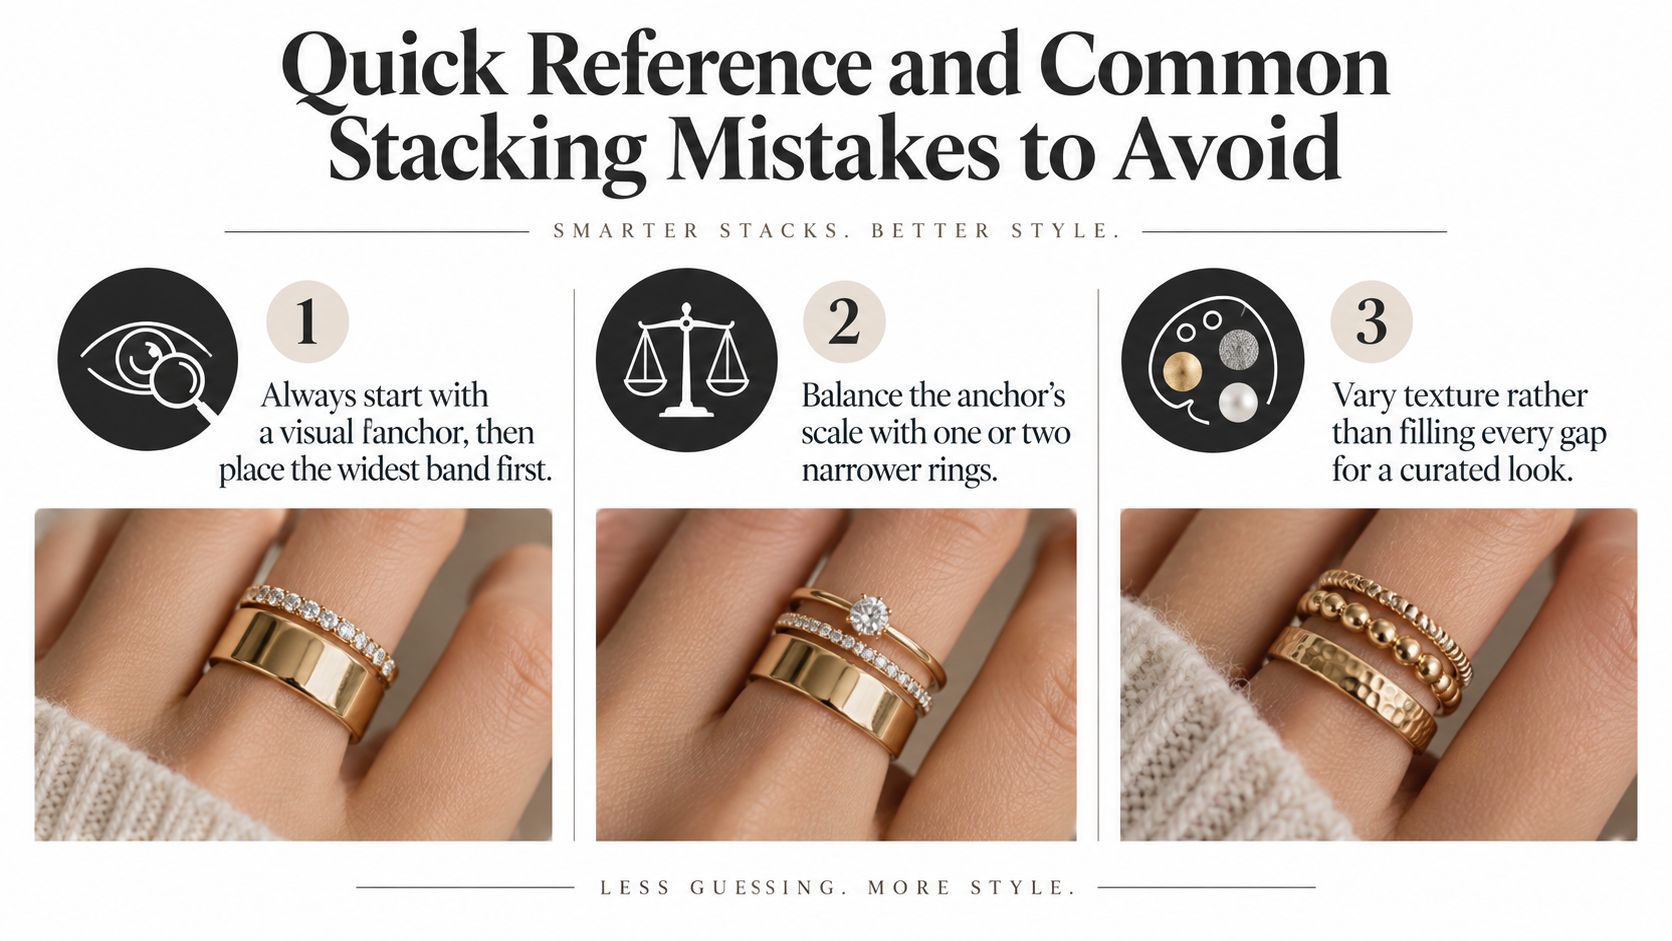
Build every stack from one visual anchor. Place the widest band first, balance it with one or two narrower rings, then stop before you fill every gap.
Use this wearable checklist
- Begin with one dominant ring: If the eye can't identify a starting point, remove a piece.
- Distribute the stack: Use both hands when one hand starts to feel visually overloaded.
- Leave negative space: Bare fingers make the worn pieces look more considered.
- Secure the fit: Rings should resist sideways rotation without pinching.
- Match the occasion: A delicate workday arrangement won't need the same weight as an evening stack.
The most common mistake is buying every ring in the same size as if each piece will be worn alone. Combined width changes the fit, so assemble the complete order before purchasing or resizing. A ring that feels perfect solo can pinch beside another band, especially around the knuckle.
Avoid pairing a large statement ring with several equally bold bands. Too many stone colors create the same problem, each piece asks the eye to look somewhere else. Delicate chains also deserve caution around raised settings, where repeated contact can cause scratches.
The eight-hour purchase test
Before committing to a new combination, wear the proposed stack through a normal day. Type, wash your hands, make a fist, and check whether the bands slide, rotate, pinch, or trap moisture. Pay attention after your hands have warmed or after you've been wearing the pieces for several hours.
A reliable quick formula is:
- One anchor ring
- One contrasting band
- One optional detail ring
If the result already feels complete, stop. If it looks crowded, edit the detail ring first. EP Fine Jewelry offers rings, including stackable designs and personalized jewelry, that can be considered as individual components within this kind of edited arrangement. Visit EP Fine Jewelry to explore pieces for a comfortable, personal stack, then assemble and test your combination before wearing it all day.